
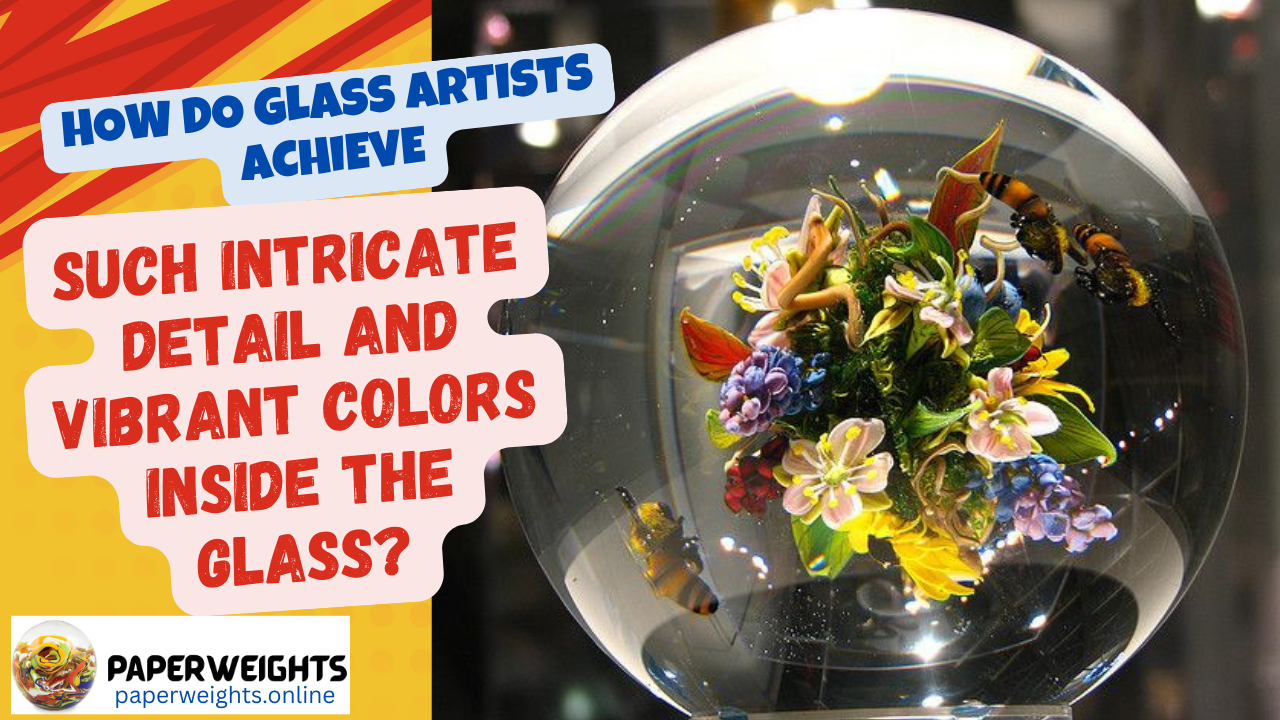
Okay, let’s talk about those moments when you look at a piece of glass art – maybe a paperweight, a marble, or even a fancy vase – and you’re just floored by what’s going on inside. You see these tiny, perfect flowers, incredibly complex patterns, or bursts of color that seem impossibly vibrant, all trapped within solid glass. It really makes you scratch your head and wonder, How do glass artists achieve such intricate detail and vibrant colors inside the glass?
It seems like magic, right? Like they somehow painted inside a solid block or froze a miniature world in time. But the reality is even cooler – it involves incredible skill, a deep understanding of how glass behaves when it’s molten hot, and some seriously clever techniques passed down through generations (and some new ones too!). Figuring out How do glass artists achieve such intricate detail and vibrant colors inside the glass? gives you a whole new appreciation for the artistry and sheer technical wizardry involved. Let’s peek behind the curtain and see how they pull off these stunning internal creations.
It All Starts with Color: Making Glass Sing
First things first, where do those amazing colors come from? Clear glass is mostly silica (sand), but to get those blues, reds, greens, and yellows, artists need to add specific ingredients to the glass mixture before it’s even melted.
- Metal Oxides are Key: Think of these like super-powered pigments for glass. Different metal oxides, when added in small amounts to the molten glass batch, create different colors. It’s a bit like alchemy!
- Cobalt Oxide: Gives deep blues.
- Chromium Oxide: Creates greens (like in classic green bottles).
- Iron Oxides: Can make greens, browns, and even light blues depending on the conditions.
- Copper Oxide: Can produce blues, greens, or even striking reds (like ruby glass).
- Manganese Dioxide: Can make purples or act as a decolorizer to cancel out iron impurities.
- Gold Chloride: Yes, real gold! Tiny amounts create rich cranberry or ruby red colors. (Expensive!)
- Selenium Compounds: Can produce reds and pinks.
- Cadmium Sulfide: Creates yellows.
- More Than Just Color: These additives don’t just color the glass; they can also slightly change its working properties, like its melting point or how stiff it is when molten. Master glass artists need to understand this chemistry to make sure different colored glasses will work well together without cracking as they cool.
- Creating Shades & Tints: By varying the amount of the metal oxide added, or sometimes by mixing different oxides, artists can create a huge palette of different shades and hues.
So, the vibrant colors you see locked inside the glass? They were baked right into the glass formula itself, thanks to some clever chemistry.
Technique #1: Millefiori – Building Patterns from Sliced Canes
We’ve talked about this one before, but it’s a prime example of achieving intricate detail. Remember “millefiori” means “thousand flowers”?
- The Gist: Artists meticulously layer different colored molten glass around a core, often using molds or tools to create specific shapes within the layers (like stars, flowers, etc.). This thick bundle is then heated and stretched wayyyy out into a long, thin rod called a cane. Magically, the pattern inside shrinks down perfectly but stays intact.
- Achieving Detail: The detail comes from the initial layering process. The more carefully and intricately the artist builds that first thick bundle, the more detailed the final miniature pattern will be when the cane is sliced. They might use dozens of tiny pre-made rods or stringers to build up complex petal shapes or geometric designs.
- How Color is Used: Different colored glasses are used for each layer or component of the pattern – a yellow core for the flower center, white glass shaped like petals around it, maybe green glass for leaves, all encased in clear or another color.
- The Result: When these thin canes are sliced into tiny discs (murrine) and arranged closely together inside a paperweight, you get that incredibly detailed, carpet-like pattern of tiny “flowers” or shapes. The detail was planned and built before it was even put into the final object.
Technique #2: Lampwork / Flamework – Sculpting with Fire
This technique allows for creating actual 3D objects inside the glass, not just patterns. Think of those paperweights with a perfect little flower, a bumblebee, or even a tiny salamander floating inside.
- The Gist: An artist works at a bench using a high-temperature torch (originally an oil lamp, hence “lampwork,” now usually gas-fueled). They use pre-made rods and tubes of colored glass.
- Achieving Detail & Color:
- Heating & Shaping: They heat the end of a colored glass rod in the torch flame until it becomes soft and molten. Using specialized tools (like tweezers, prodders, cutters) and precise movements, they shape, pull, twist, and attach tiny bits of molten glass to create miniature sculptures. It’s like sculpting with incredibly hot, liquid honey that hardens quickly!
- Building Complexity: They might create individual petals for a flower one by one, carefully shaping each and attaching it to a stem. They can add tiny dots of black glass for an insect’s eyes or delicate stripes of color for its wings. Different colored rods are introduced as needed.
- Layering (Sometimes): They might build up layers on the sculpture itself, like adding veins to a leaf.
- Incorporation: Once the miniature sculpture is complete (and often while it’s still attached to a temporary glass handle), it’s carefully encased within molten clear glass, usually gathered on the end of a blowpipe or pontil rod. This step requires great care to avoid distorting the delicate sculpture or trapping unwanted bubbles.
- The Result: You get a fully formed, often incredibly realistic or stylized, 3D object seemingly frozen inside the clear glass dome. The detail comes from the artist’s direct manipulation and sculpting skills at the torch.
Let’s imagine an artist making a lampwork ladybug (totally made up!): She starts with a rod of red glass, heating the tip and shaping it into the basic dome of the ladybug’s body. Then, using a thin rod of black glass (a stringer), she carefully melts tiny dots onto the red body. She forms the head from black glass, maybe adds tiny white dots for eyes. She might even add delicate little legs made from thin black stringers. Once the ladybug is perfect, she carefully attaches it to a gather of clear molten glass and encases it to form the paperweight. Every detail was added step-by-step with heat and tools.
Technique #3: Latticinio & Zanfirico – Creating Intricate Threads & Ribbons
Sometimes the detail inside glass isn’t a picture or object, but delicate, lace-like patterns or spiraling ribbons of color. These often involve techniques like Latticinio and Zanfirico, closely related to millefiori cane-making.
- Latticinio: This involves creating canes with fine threads of opaque white glass (or sometimes colored glass) embedded within clear glass, often twisted to create a spiral or lace-like effect. Slices of these canes, or the canes themselves, can be arranged inside paperweights or blown into vessels. Think of those delicate white mesh or gauze patterns you sometimes see as backgrounds in paperweights.
- Zanfirico: This is a more complex version where multiple pre-made Latticinio canes (or other patterned canes) are bundled together, heated, fused, and then twisted and encased in clear glass. This creates incredibly intricate spiraling ribbon effects.
- How Detail & Color Are Achieved: The detail comes from the precise creation and arrangement of the initial thin colored threads within the canes, and the controlled twisting during the process. Vibrant colors are introduced through the colored glass used for the threads themselves.
- The Result: These techniques create mesmerizingly complex linear and spiral patterns that add texture and depth, often used as backgrounds for millefiori or lampwork elements, or as the main feature themselves.
Technique #4: Surface Decoration (Before Encasing)
Sometimes, the detail isn’t deep inside, but on a layer just beneath the final clear dome.
- Enameling: Artists can paint designs onto a glass surface using special glass enamels (powdered glass mixed with a binder). This is then fired to fuse the enamel permanently to the glass. This painted piece could then potentially be encased in more clear glass.
- Frit & Powders: Fine grains of colored glass (frit) or powdered glass can be sprinkled or arranged onto a molten glass surface and then fused in. This can create speckled effects or painterly designs before being encased.
Technique #5: Controlled Bubbles & Other Inclusions
Sometimes the “detail” isn’t even colored glass! Artists can intentionally trap air bubbles in precise patterns (like spirals or flower shapes) within the clear glass as they build up the paperweight. These bubbles catch the light in interesting ways. Other non-glass inclusions, like flakes of shimmering dichroic material, can also be incorporated between layers of clear glass.
The Overarching Answer: Layering, Control, and Heat!
So, How do glass artists achieve such intricate detail and vibrant colors inside the glass? The common threads running through all these techniques are:
- Building in Layers: Whether it’s layering colors in a millefiori cane, adding tiny bits of glass in lampwork, or arranging pre-made elements, the detail is almost always built up incrementally.
- Precise Heat Control: Glass only behaves the way artists want it to within specific temperature ranges. They need incredible control over their torches, furnaces, and kilns to melt, shape, fuse, and anneal the glass without disaster.
- Mastery of Material: Understanding how different colors and types of glass melt, flow, stick together, and cool is essential. It takes years of practice to develop this intuition.
- Specialized Tools: From the blowpipe and pontil rod to tiny metal picks, tweezers, molds, and shears, artists use a wide array of specialized tools to manipulate the hot glass.
- Patience and Steady Hands: Creating tiny details or arranging hundreds of murrine slices requires immense focus and dexterity.
- Encasing & Magnification: Finally, encasing the finished work in crystal-clear glass protects it and often magnifies the details, making them even more impressive. And don’t forget the crucial slow cooling (annealing) to keep it from cracking!
It’s not one single trick, but a combination of chemistry (for color), physics (for heat and stress), incredible manual skill, and artistic vision, often utilizing techniques refined over centuries.
A Table of Techniques
| Technique | Core Idea | How Detail/Color Achieved | Look & Feel |
| Millefiori | Slicing patterned glass canes (murrine) | Intricate layering of colors/shapes in the initial cane | Dense patterns, often floral, like a tiny mosaic |
| Lampwork | Sculpting colored glass rods with a torch | Direct shaping, attaching tiny details, using color rods | 3D objects (flowers, insects, etc.) inside clear glass |
| Latticinio/ Zanfirico | Twisting canes with internal colored threads | Precise creation/arrangement of threads, twisting | Lace-like patterns, swirling ribbons of color |
| Surface Decor | Painting/Sprinkling before encasing | Enamels, glass frit/powders fused onto a surface | Designs appear on a layer just below the outer dome |
| Inclusions | Trapping bubbles or other materials | Precise placement of air or non-glass elements | Patterns of bubbles, shimmering effects |
The Magic is Skill, Not Sorcery
It’s easy to look at a complex glass paperweight and think it must involve some kind of impossible magic. But understanding How do glass artists achieve such intricate detail and vibrant colors inside the glass? reveals that the “magic” is actually the result of deep knowledge, incredible hand-skills, precise control over a very challenging material, and a whole lot of dedication to the craft.
Whether it’s the patient layering of a millefiori cane, the delicate sculpting of a lampwork flower, or the controlled twist of a latticinio ribbon, artists manipulate glass in its molten state to create these wonders before freezing them forever within a clear embrace. It’s a fiery, demanding process that results in objects of captivating beauty and seemingly impossible detail.
Glass Art Mysteries? FAQ Time!
Q1: How do they get the colors inside the clear glass? Do they inject it?
A: Nope, no injecting! The color is part of the glass itself. Artists either use pre-colored glass rods (for lampwork) or layer different colored molten glasses together when making canes (for millefiori). The detailed colored part is created first, and then it’s carefully encased, or enveloped, in molten clear glass which forms the outer body of the paperweight.
Q2: Does the stuff inside melt when they cover it with hot clear glass?
A: That’s where the skill comes in! They have to control the temperatures very carefully. The internal elements (like a finished lampwork flower or arranged millefiori slices) are often preheated or managed so they are hot enough to fuse properly with the clear glass gather without completely melting and losing their shape. It’s a delicate balance – hot enough to stick, but not so hot it turns into an undefined blob.
Q3: How do they make the tiny details, like the eyes on a lampwork bug?
A: With incredible precision! Using very thin rods of colored glass (called stringers), an artist can heat just the very tip in the torch flame to get a tiny molten dot, then carefully touch that dot onto the main sculpture (like the bug’s head) to create an eye. They might use tiny metal picks or tools to further shape these minuscule additions while the glass is still hot and pliable. It requires super steady hands!
Q4: Is making this kind of glass art expensive?
A: The materials themselves (specialty colored glass, clear crystal glass, fuel for torches/furnaces) can be costly, and the equipment needed is specialized. But the biggest factor is the immense skill and time involved. Creating complex millefiori canes or intricate lampwork sculptures takes years of practice and many hours of work per piece. This is why high-quality art glass paperweights can be quite expensive – you’re paying for the artist’s expertise and labor as much as the materials.
Q5: Can I learn to do this?
A: Absolutely! Many glass studios and art centers offer classes in lampworking (often starting with beadmaking) and sometimes even paperweight making or millefiori cane basics. It takes dedication and practice (and respecting the safety protocols around hot glass!), but it’s a fascinating craft that people can definitely learn. Just don’t expect to make a perfect Baccarat replica in your first class!
People Also Ask
How Do They Get Images Inside Glass?
Ever peered into a glass paperweight, a decorative orb, or even a piece of custom awards crystal and marveled at the image seemingly floating, suspended, right there in the middle of the solid glass? It’s pretty magical, right? It makes you wonder, how do they get images inside glass? Is it some kind of tiny projector, a clever trick with mirrors, or actual sorcery?
While it might look like magic, it’s actually a beautiful blend of artistry, science, and some seriously clever techniques that have evolved over centuries. There isn’t just one single method; different approaches create different stunning effects. Let’s pull back the curtain on a few of these amazing processes.
1. The Art of Encased Glass: Building Worlds from Within (Lampwork & Millefiori)
This is where traditional, often breathtaking, artistry comes into play, especially in things like art glass paperweights.
- Lampwork (Flamework): Imagine an artist working like a miniature sculptor, but their medium is molten glass! Using a high-temperature torch, they melt colored glass rods and skillfully shape them into tiny, intricate figures – delicate flowers with individual petals, lifelike insects, whimsical animals, or abstract forms.
- The Encasing Magic: Once these tiny sculptures are complete, they are carefully picked up on a gather of molten clear glass (often crystal for its clarity). Then, more molten clear glass is expertly layered over the top, fully encasing the lampwork creation. The real skill here is doing this without distorting the delicate internal sculpture or trapping unwanted air bubbles. It’s a hot, precise dance!
- Millefiori (“Thousand Flowers”): This iconic technique creates those beautiful, densely packed floral patterns.
- Making the Canes: It starts with creating long, patterned glass rods called “canes.” Layers of different colored glass are built up, sometimes in intricate patterns, and then stretched thin while still hot.
- Slicing & Arranging: These canes are then sliced into small cross-sections, revealing the flower-like pattern. Artists painstakingly arrange these tiny “flowers” into a design.
- Encasing the Garden: Just like with lampwork, this arrangement is then carefully picked up by molten clear glass and fully encased to form the paperweight. The result is that stunning, miniature garden effect.
The skill involved in these traditional encasement techniques is immense, often honed over many years. You can often see examples of this kind of incredible artistry at institutions like The Corning Museum of Glass or in the work of renowned paperweight artists.
2. Sulphide Cameos: A Silvery Portrait Suspended in Time
This is a really cool 19th-century technique that creates a ghostly, almost metallic-looking image inside the glass.
- The Ceramic Medallion: A small, detailed medallion is made from unglazed ceramic or fine clay, often depicting a portrait or classical scene.
- The Trapped Air Illusion: When this ceramic piece is carefully embedded within molten clear glass, a very thin layer of air gets trapped between the ceramic and the hot glass. This trapped air creates a silvery, reflective interface, making the white ceramic image appear to float with a striking, three-dimensional look. It’s a beautiful optical effect!
3. Subsurface Laser Engraving (3D Crystal Etching): The High-Tech Marvel
This is a more modern, and frankly mind-blowing, technique that creates those incredible three-dimensional images you see inside crystal blocks – think of a perfect rose, a company logo, or even a detailed portrait seemingly etched right into the middle of the solid crystal.
- No Openings Needed! Unlike encasement where the glass is built around an object, subsurface laser engraving happens within an already solid block of optically clear glass or crystal.
- The Laser’s Precision: A high-powered laser beam is focused to a precise point inside the glass block. At this focal point, the laser’s intensity is enough to create a tiny fracture or “micro-crack” within the glass.
- Building the Image, Dot by Dot: A computer controls the laser, moving its focal point and firing it thousands, or even millions, of times. Each laser pulse creates a single tiny dot. By precisely placing these countless dots, a complex 3D image is slowly built up within the crystal, point by point. It’s like 3D printing, but with light and tiny fractures!
You’ll see this technique used a lot for personalized crystal awards, corporate gifts, and photographic keepsakes. Companies specializing in “3D crystal” or “laser-etched glass” use this amazing technology.
4. Other Techniques (Briefly!)
- Sandblasting/Etching (Surface, but can give an illusion of depth): While these primarily affect the surface of the glass, deep sandblasting or layered etching can create designs that appear to have some internal depth.
- Decals/Transfers (Before Firing): In some types of decorated glassware (not typically paperweights), decals can be applied and then fired onto the glass, becoming part of the surface.
So Many Ways to Capture Beauty in Glass!
So, how do they get images inside glass? As you can see, there isn’t just one answer! From the painstaking, traditional handcrafting of lampwork and millefiori artists to the high-tech precision of subsurface laser engraving, humans have found some truly ingenious ways to trap beauty, memories, and intricate designs within this seemingly simple material.
Each method has its own unique charm and results in a different kind of internal artistry. It really makes you appreciate the skill and innovation that goes into creating these captivating glass objects!
What’s the most amazing image you’ve ever seen captured inside glass? Or do you have a favorite technique? Share your thoughts in the comments below!
Explore More (See the Magic in Action!):
- YouTube “Glassblowing” or “Lampwork” Videos: There are countless videos showing artists at work, which really brings the encasement process to life.
- Websites of Laser Engraving Companies: Many showcase examples of 3D subsurface engraving and sometimes explain the technology.
- The Corning Museum of Glass (CMoG) Online Resources (www.cmog.org): A fantastic place to learn about all kinds of glassmaking techniques, both historical and contemporary.